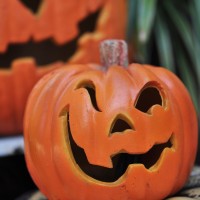
Whatever you think about Halloween with its ghosts and ghouls, spooks and trick-or-treaters, there’s one thing everyone can enjoy this season, and that’s a little pumpkin carving!
Whilst Jack-O-Lanterns are best known and celebrated in the US, the tradition originated with Irish immigrants who used large turnips and potatoes as a convenient canvas for decorative lights that echoed the legend of Stingy Jack, a wily character who made a deal with the devil that left him wandering the Earth after his death with only a coal in a carved-out turnip to light his path…
In Ireland and Scotland, people
made their own versions of
Jack’s lanterns by carving
scary faces into turnips or potatoes and placing them in windows to frighten
Stingy Jack and other wandering evil spirits from their doorstep…
Once they made their way to America, Irish immigrants discovered that the more plentiful pumpkin was an ideal medium for their artistry, and the tradition was soon established!
Of course, you can make yours just as scary, friendly, quirky and cute as you like. But here’s how to get started…
PUMPKIN CARVING: GETTING READY
Before you begin, you will need your kit at the ready (see list at left)…
STEP ONE
Using paper and pencils, have kids draw up a variety of different shaped eyes, noses and mouths that you can use as inspiration when looking at each of your pumpkins.
STEP TWO
Do a ‘prison line up’ of your pumpkins and see what characters appear from their natural shape. Some will lend themselves to wide wonky mouths, others will suit longer O’s for eyes; let your pumpkin’s shape determine the character you’re creating. There are also a brilliant array of templates online that you can use (see some suggestions at left) – but we recommend starting out by doing one that’s your very own original design.
STEP THREE
You can either cut the top off the pumpkin in a simple circular shape, with zigzags, or even in waves of hair if you like, being careful to ensure that it’s all in one ‘cut’, so you can replace his hat when finished; or, if you want to keep the top of your pumpkin’s head pristine, cut a circle in the back of the pumpkin to allow access to the inside. Now hand out the spoons so kids can get scooping the seeds and pith and putting this into a bowl for the compost or garden (or even plant some and see what you might grow…)
STEP FOUR
Now have your child draw their design on the pumpkin with a water based pen. Encourage them to make the outlines big enough that the features take up a good proportion of the surface – this will ensure their pumpkin looks really dramatic when lit up. Any mistakes can be washed away and redrawn. If you’re using a paper template, tape the template to your pumpkin, then use a toothpick to poke through the paper along the outlines, creating a dot-to-dot in the pumpkin’s skin. Take the template away and you’ll have a join-the-dots game as well as a carving exercise!
STEP FIVE
Time to carve. Involve your child by talking through the carving process and showing him or her what you are doing. Work slowly and carefully (the last thing you want to do is to show by example how dangerous sharp carving tools can be!). If you feel your child is responsible and old enough to participate in the carving, reinforce that you always, always point the sharp edges of tools away from yourself, then set them working on a part you’ve started for them, as the outermost layer of skin is the toughest part! Carving from the centre of each shape to the outline will also minimise possible errors. You can create dramatic effects by varying the depth of your carving, making shallower cuts that do not go entirely through the skin of the pumpkin – this will allow candlelight to shine through the skin in varying degrees of intensity.
STEP SIX
As you carve, keep checking in with your child that you’re doing it the right way, both from a safety and from a creative perspective – that way, your child can restate the rules of using sharp tools, and, from a creative perspective, they won’t rue the fact that you’re the one doing the carving and attempt doing it themselves when you’re not around.
STEP SEVEN
Use a damp cloth to wipe away pen marks, pop a fat or a votive candle (chosen for their stability so they won’t topple inside your pumpkin) or a battery operated light into the base and put the lid back on; if your candle keeps going out, simply make one or two features bigger to allow more air in, or cut a ‘breathing hole’ in the back of your pumpkin.
STEP EIGHT
Turn out the lights and admire your brand new family member.
Safety note: Never leave a lit candle unattended.